Winter tent camping challenges even the most experienced outdoor enthusiasts. Freezing temperatures, unpredictable snowfall, and harsh winds create conditions that demand proper preparation and specialised equipment.
Despite the additional challenges, camping during the coldest months offers incredible rewards – pristine snow-covered landscapes, absolute solitude, and star-filled skies unmarred by summer haze. However, venturing into winter wonderlands unprepared can quickly transform an adventure into a dangerous situation.
This comprehensive guide outlines 15 essential gear items specifically designed for safe and comfortable winter camping adventures. From four-season tents that withstand heavy snow loads to specialized stoves that function in sub-zero temperatures, each recommendation has been selected based on performance in extreme conditions. Whether you’re planning your first cold-weather expedition or looking to upgrade your existing kit for 2025, these tools will help ensure your winter wilderness experience remains memorable for all the right reasons.
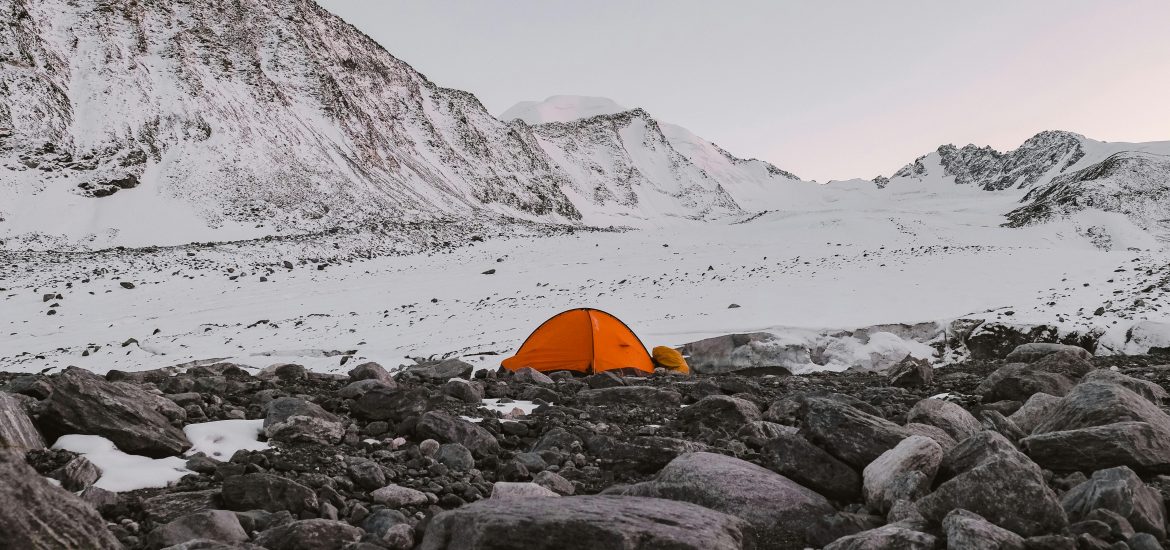
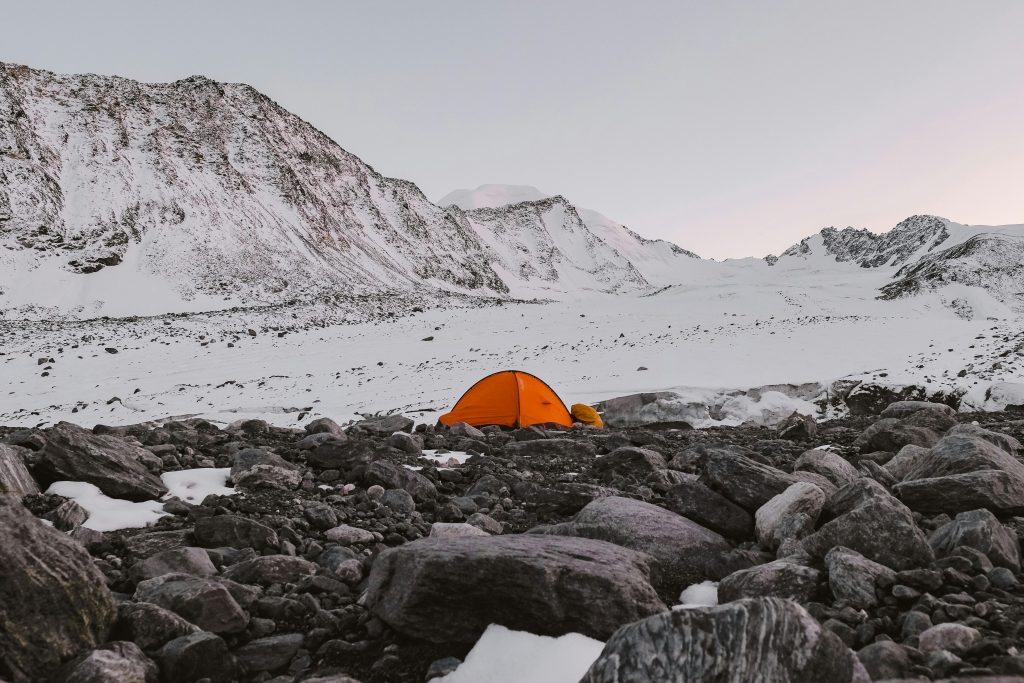
4-Season Tent
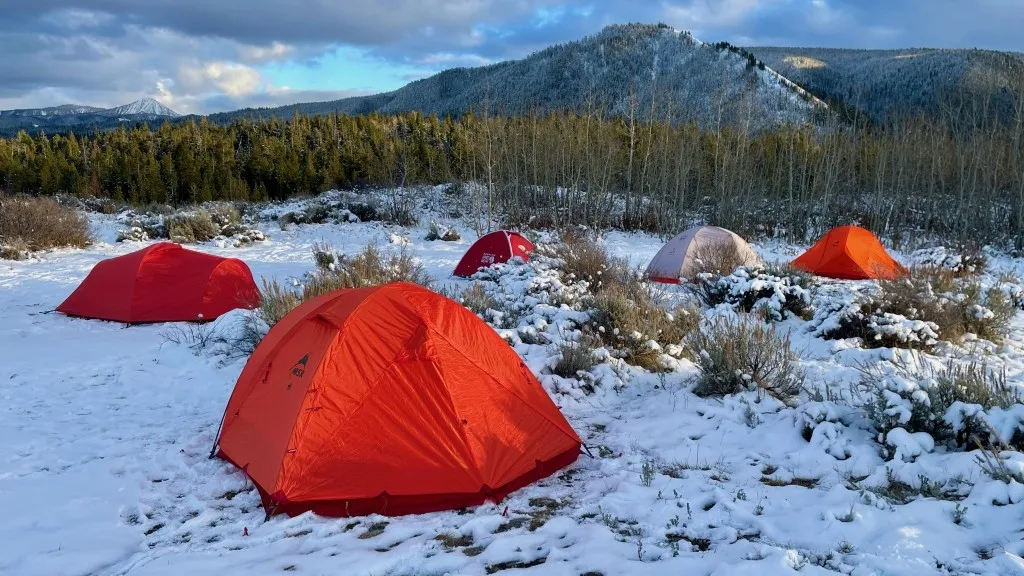
A proper shelter stands as your first defense against winter’s fury. Unlike standard camping tents, 4-season tents feature specialized designs specifically engineered for harsh winter environments.
4-Season Tent Features
Four-season tents utilize sturdier materials and robust pole structures to withstand extreme conditions. These shelters feature rigid shapes and stronger pole geometries that bear substantial snow loads and resist powerful winds. Additionally, they include less mesh and more durable fabrics to combat the abrasive nature of snow and ice. Many models incorporate snow flaps around the perimeter to prevent cold air intrusion. Furthermore, strategic ventilation options help manage moisture and prevent condensation build-up inside the tent.
Why a 4-Season Tent is Essential
For winter expeditions, a standard 3-season tent simply won’t suffice. Four-season tents provide critical protection against high winds exceeding 35 mph and moderate snowfall. The increased structural integrity ensures safety during overnight snowfall and temperature drops. Mountaineering tents particularly excel in exposed alpine environments where weight and space considerations are paramount. Without adequate shelter, condensation and freezing temperatures can compromise your gear and safety.
Tips for Choosing the Right 4-Season Tent
Consider your primary use case before selecting a winter tent:
Mountaineering tents: Prioritise lightweight designs with robust weather protection for alpine environments
Basecamp tents: Heavier but sturdier for prolonged stays in harsh conditions
Treeline tents: Hybrid options with better weather resistance than 3-season models
Evaluate weight carefully—models range from ultralight options at 1.49 pounds to expedition-worthy designs exceeding 10 pounds. Double-wall tents offer better ventilation and condensation management compared to single-wall alternatives.
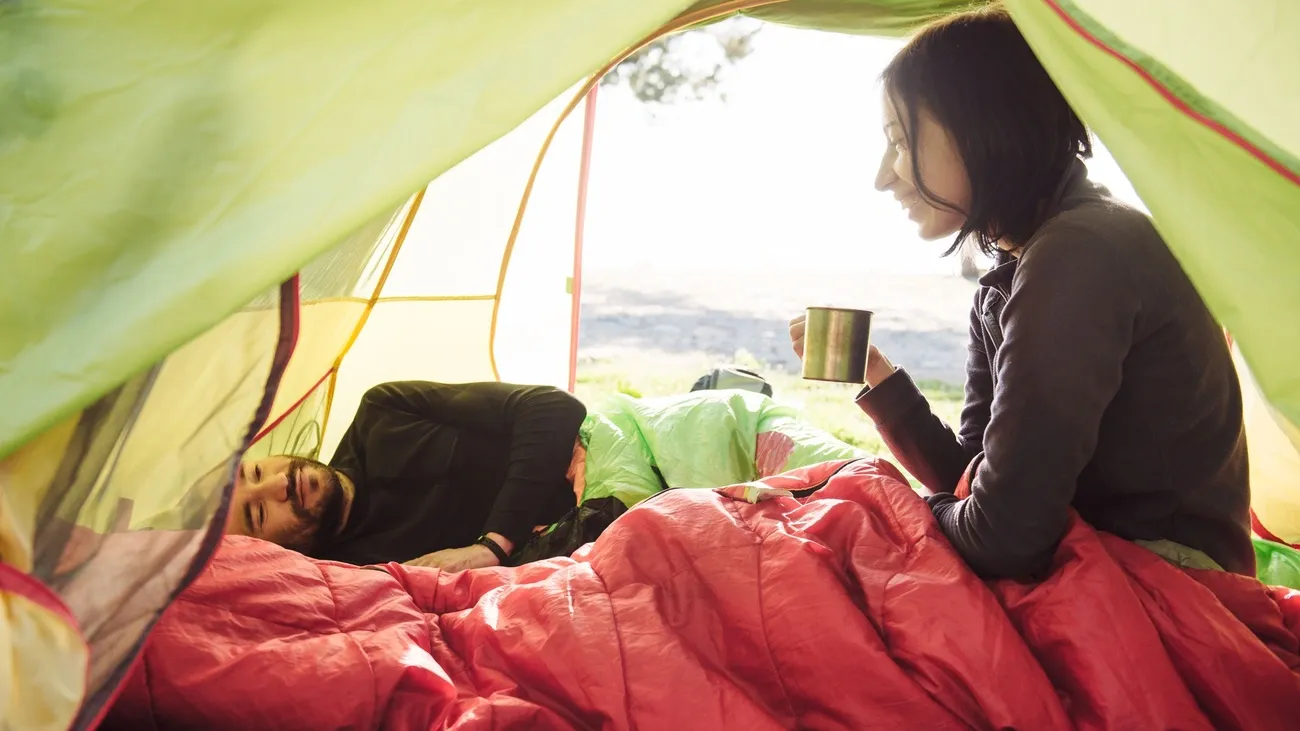
Cold-Weather Sleeping Bag

Your sleeping bag serves as your portable cocoon against freezing temperatures during winter tent camping expeditions. Selecting the right one might mean the difference between comfort and a sleepless, shivering night.
Cold-Weather Sleeping Bag Temperature Ratings
Most sleeping bags today feature standardised ISO or EN ratings that allow for consistent comparison between brands. These ratings include a Comfort rating (temperature where a cold sleeper remains comfortable) and a Lower Limit rating (temperature where a warm sleeper maintains thermal balance). Generally, purchase a bag rated at least 10 degrees colder than the lowest temperatures you expect to encounter. Remember that ISO stops rating at -4°F (-20°C), consequently anything below requires additional testing.
Down vs Synthetic Insulation
Down insulation provides superior warmth-to-weight ratio and compressibility. Higher fill power (600-900) indicates better quality—the higher the number, the lighter and more packable the bag. Meanwhile, synthetic insulation maintains its insulating properties when wet and typically costs less. Many manufacturers now offer water-resistant down treatments to mitigate its primary weakness.
How to Maximize Warmth
Initially, ensure you’re using an insulated sleeping pad with appropriate R-value. Furthermore, add a sleeping bag liner for 5-15 degrees of additional warmth. Wearing dry base layers and a hat prevents heat loss through exposed body parts. Eat complex carbohydrates before bed to fuel your body’s internal furnace throughout the night. Empty your bladder before sleeping—your body wastes energy warming urine.
Insulated Sleeping Pad

Even the warmest sleeping bag becomes ineffective without proper ground insulation. Insulated sleeping pads create that crucial barrier between your body and the frozen ground during winter tent camping.
Insulated Sleeping Pad R-Value
R-value measures a pad’s resistance to heat flow—essentially, how effectively it insulates against cold surfaces. For winter camping, select pads with an R-value of at least 5. The scale is straightforward: a pad with an R-value of 2.0 provides half the insulation of a pad rated 4.0. In fact, standardised testing (ASTM FF3340) now ensures consistent ratings across brands.
Foam vs Inflatable Pads
Closed-cell foam pads offer distinct advantages: they’re inexpensive, lightweight, virtually indestructible, and provide consistent insulation regardless of conditions. Nevertheless, they typically have lower R-values (around 2.0).
Air pads excel in comfort and warmth-to-weight ratio. Many incorporate reflective materials or synthetic insulation, providing superior R-values. The primary drawbacks include potential punctures and noise from crinkly insulating materials.
Layering Pads for Extra Warmth
First and foremost, R-values are additive—combining pads increases total insulation. A popular approach involves placing a closed-cell foam pad beneath an inflatable pad, yielding both comfort and protection. This strategy creates a reliable system offering increased warmth plus insurance against punctures. For extreme conditions, consider reaching combined R-values of 9-10.
Sleeping Bag Liner
Adding a sleeping bag liner completes your winter sleep system, acting as both protector and temperature booster for cold-weather expeditions.
Sleeping Bag Liner Benefits
Sleeping bag liners act as a barrier between you and your sleeping bag, trapping sweat, oils, and dirt that would otherwise contaminate your bag. This preservation extends your sleeping bag’s life by reducing the need for frequent washing. Moreover, liners are significantly easier to clean than sleeping bags—simply toss them in with regular laundry while in town. For those venturing into hostels or huts, liners also provide a hygienic barrier against questionable bedding.
How Much Warmth It Adds
Depending on material and construction, liners can boost your sleeping bag’s temperature rating by 5°F to 15°F. Some premium thermal options claim to add up to 25°F of warmth. Realistically, expect around 7°F from standard Reactor liners, 10°F from Extreme versions, and up to 14°F from fleece models.
Best Materials for Liners
Silk liners offer exceptional lightweight performance (about 5 oz) alongside breathability and moderate warmth. Fleece and microfleece provide maximum warmth (up to 12°F) but add bulk. Synthetic options with Coolmax® excel in moisture-wicking for humid conditions. Cotton delivers durability and comfort at an economical price point, whereas specialised Thermolite® liners with hollow-core fibers trap air effectively for superior insulation.
Liquid-Fuel Stove

Reliable heat becomes a non-negotiable necessity for winter tent camping. Liquid-fuel stoves offer superior performance in freezing temperatures where other cooking systems fail.
Why Liquid-Fuel Stoves Work in Winter
Primarily, liquid-fuel stoves excel in cold conditions thanks to manual pressurization. Unlike canister stoves that rely on internal pressure that decreases as temperatures drop, liquid-fuel stoves allow you to maintain consistent pressure with a hand pump. This ensures powerful output regardless of how cold it gets—even in temperatures well below -30°C. Furthermore, these stoves operate effectively at higher altitudes, making them ideal for mountaineering expeditions.
Fuel Efficiency in Cold Weather
Though slightly heavier than canister stoves, liquid-fuel models provide greater cold-weather efficiency that ultimately saves weight. Since they maintain strong, consistent flames in frigid conditions, they heat water faster—critical when melting snow for drinking. Economically speaking, white gas costs approximately half the price of canister fuel. Plus, refillable fuel bottles eliminate waste compared to disposable canisters.
Stove Safety Tips
Always test your stove at home before taking it into the backcountry. Keep flammable materials away from your cooking area and never operate stoves inside tents or vestibules due to carbon monoxide risks. Store fuel bottles securely away from ignition sources. For transportation, use only manufacturer-recommended containers with liquid-tight caps. Undeniably, proper maintenance ensures reliability—many models allow field servicing if problems arise.
Cookware for Melting Snow
Proper cookware makes all the difference when turning snow into life-sustaining water during winter tent camping expeditions. The right pot becomes your essential hydration tool when streams and lakes lie frozen beneath winter’s grip.
Choosing the Right Pot Size
Selecting the appropriate pot capacity matters substantially for efficient snow melting. Opt for a 2L pot or larger with a wide bottom for each person in your group. Tall, narrow, and low-volume pots work poorly as they require constant monitoring. Although lightweight titanium appeals to many backpackers, anodized aluminum pots typically outperform titanium for snow melting because they distribute heat more evenly without hot spots. The ideal pot size typically falls between 1.5-2.5 liters, as massive pots exceeding 4 quarts become impractically slow to heat.
Tips for Melting Snow Efficiently
First, always begin with “seed water” in your pot—about an inch or a cup—before adding snow. This critical step prevents scorching your pot, which creates awful smells and potentially ruins your cookware. Subsequently, add snow gradually as it melts rather than filling the pot completely. Keep the lid on whenever possible to trap steam and improve melting efficiency. Accordingly, clean snow produces better-tasting water than dirty snow, so collect from pristine areas away from high-traffic zones. Remember that snow contains merely 5-15% water by volume—you’ll need 6.5-20 liters of snow for just one litre of water!
Cleaning and Storage
Regular maintenance preserves your cookware’s longevity. Following each use, clean thoroughly to remove food particles that might contaminate future water batches. For titanium cookware, straightforward cleaning with minimal soap ensures continued performance. Prior to storing, dry completely to prevent corrosion, especially with aluminium pots. Between camping trips, store in a dry place with the lid separate to prevent mustiness.
Insulated Water Bottles
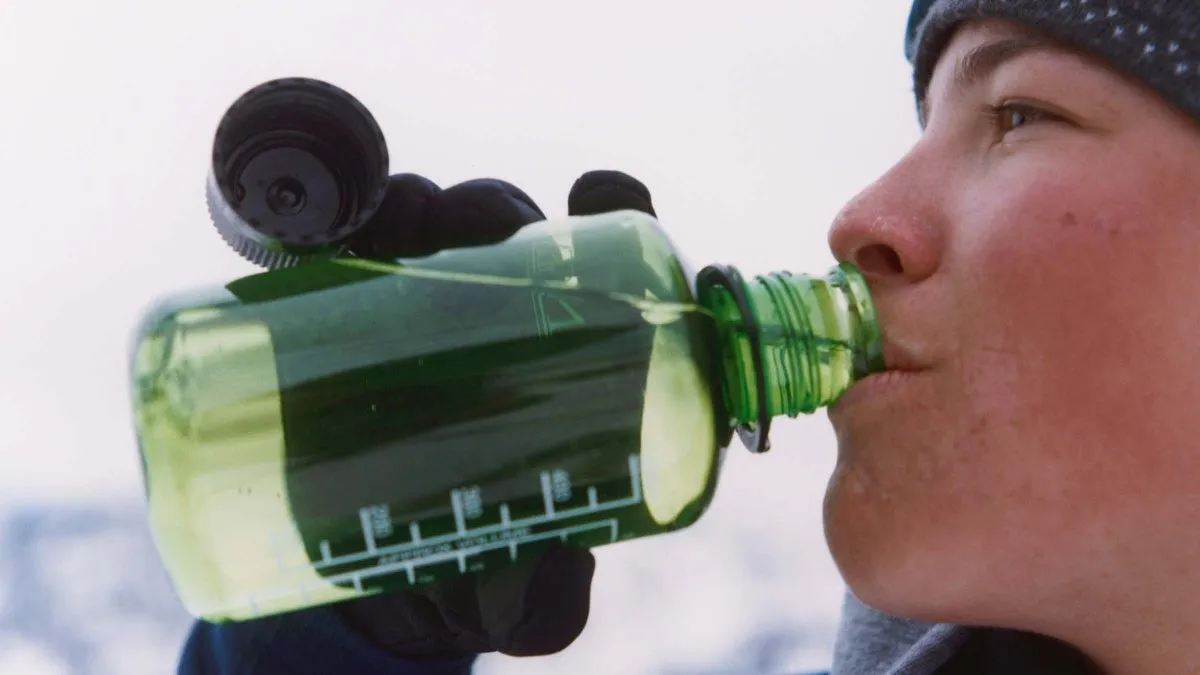
Staying hydrated ranks among the most critical challenges for winter tent camping enthusiasts. Standard hydration bladders and tubes freeze easily in cold temperatures, even insulated ones.
Preventing Freezing
Instead of risking frozen hydration systems, rely on wide-mouth bottles like Hunersdorf (with yellow caps) or milky white Nalgene HDPE bottles that resist cracking when filled with hot water. Fill bottles with water as hot as possible, then turn them upside down to prevent caps from freezing shut. Besides, attaching insulated bottles to your backpack’s exterior with a carabiner ensures easier access throughout the day.
Using Bottles as Bed Warmers
Taking a quart of hot water to bed serves dual purposes – providing nighttime hydration plus adding crucial warmth. This practice supports digestive processes that generate body heat after dinner. Alternatively, on particularly frigid nights, some campers fill bottles with boiling water before sleeping. Even better – slip your water bottle into your sleeping bag overnight to prevent freezing while simultaneously warming your sleeping space.
Best Bottle Covers
Neoprene “parkas” or insulated sleeves significantly slow freezing processes. The Forty Below Bottle Boot features 6.5mm closed-cell neoprene foam without zippers that might break in cold conditions. For DIY solutions, wool socks provide effective insulation – cover them with plastic bags to keep dry. Fortunately, high-performance options like Hydroflask retain impressive heat – testing showed water remained at 130°F after six hours in 32°F temperatures.
Base Layers
The foundation of any effective winter clothing system begins with quality base layers that manage moisture and maintain body warmth in freezing conditions.
Best Materials for Base Layers
Merino wool stands out as a premium option for winter tent camping, offering natural insulation that works even when damp, alongside impressive odor resistance. Unlike traditional wool, merino feels soft against skin while naturally regulating temperature across varying conditions. Synthetic materials like polyester and polypropylene provide superior durability and dry significantly faster than wool, making them ideal for high-intensity activities where sweating is inevitable. For versatility, consider merino-synthetic blends that combine wool’s comfort with synthetic durability.
How Base Layers Regulate Temperature
The primary function of base layers involves wicking moisture away from skin to prevent dangerous cooling. This action creates a microclimate between fabric and body that retains warmth while allowing vapour to escape. Without proper wicking, sweat accumulation could lead to hypothermia once activity levels decrease. Notably, synthetics excel at moisture management but retain odors, whereas merino continues insulating effectively even when wet.
Top Picks for 2025
REI Midweight Half Zip earns best overall recognition for balancing versatility and comfort. For maximum warmth, Arc’teryx Rho Heavyweight Zip Neck excels in frigid conditions. Budget-conscious campers should consider Helly Hansen Lifa Stripe, offering performance at approximately $63.
Mid and Outer Layers
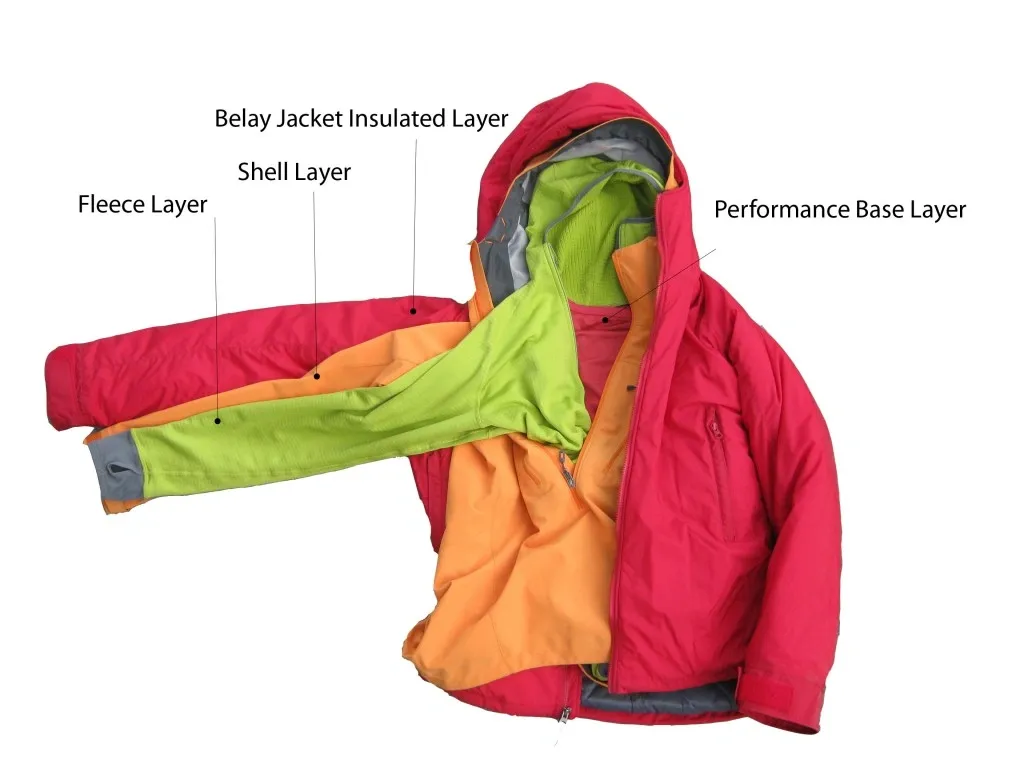
Image Source: Outdoor Gear Lab
Proper mid and outer layers complete your defense against winter’s extreme conditions, forming critical components in your winter tent camping clothing system.
Layering Strategy for Winter
The three-layer approach forms the backbone of effective cold-weather dressing. Your mid layer traps warmth while your outer layer shields from elements. For peak performance, add or remove layers based on activity level – shedding a layer before sweating during uphill climbs, yet adding layers before descending. This active management prevents dangerous cooling from accumulated moisture. First, for extended stationary periods, additional insulation becomes essential as your body produces less heat.
Waterproof and Windproof Options
Outer layers typically feature varying levels of weather protection. Waterproof breathable shells offer maximum protection against precipitation while allowing vapor escape – making them ideal investments for serious winter campers. Water-resistant breathable options work effectively for light precipitation or high-output activities. Soft shells provide superior breathability for intense movement periods. For your mid layer, fleece offers excellent breathability that maintains warmth even when damp. Down-insulated jackets deliver exceptional warmth-to-weight ratio but lose effectiveness when wet. Synthetic insulation, conversely, retains warmth even in damp conditions.
Recommended Jackets and Pants
For 2025, top performing mid layers include The North Face FutureFleece Hoodie with exceptional breathability and warmth-to-weight ratio, plus Patagonia R1 Air Fleece providing cozy comfort with innovative zigzag knit pattern. For outer shells, Arc’teryx Beta SL with next-generation Gore-Tex ePE membrane delivers maximum protection with sustainability benefits. For pants, REI Co-op Activator Pants provide lightweight performance with wind resistance up to 30 mph – perfect for all-day wear in snow.
Winter Gloves and Mittens
Protecting your hands stands as a critical priority during winter tent camping, as fingers are exceptionally vulnerable to cold injury.
Glove Layering System
Much like body clothing, effective hand protection relies on a multi-layer approach. Begin with thin, highly breathable liner gloves—typically made from fleece, merino wool, or synthetic materials—which maintain dexterity while providing basic insulation. For increased protection, add waterproof/breathable shell mitts or gloves over these liners. This combination allows you to adjust to changing conditions and activity levels, removing outer layers when performing tasks requiring greater dexterity.
Waterproofing and Insulation
Quality insulation makes all the difference in frigid conditions. Synthetic materials like PrimaLoft Gold offer excellent warmth even when damp. Indeed, some specialised gloves incorporate PrimaLoft Gold with Aerogel technology for superior thermal efficiency. For ultimate protection, mittens generally outperform fingered gloves by allowing fingers to share warmth.
Extra Liners and Backups
Always pack multiple pairs of liner gloves—perspiration can quickly soak through a single pair during vigorous activity. Given that wet gloves rapidly lose insulating properties, carrying at least two to three pairs proves essential for all-day excursions. In extreme conditions, the “nitrile glove hack” (wearing examination gloves under liners) prevents hand perspiration from dampening outer layers. Just be cautious removing nitrile gloves in cold weather to avoid the dangerous “flash off” cooling effect.
Winter Boots and Gaiters
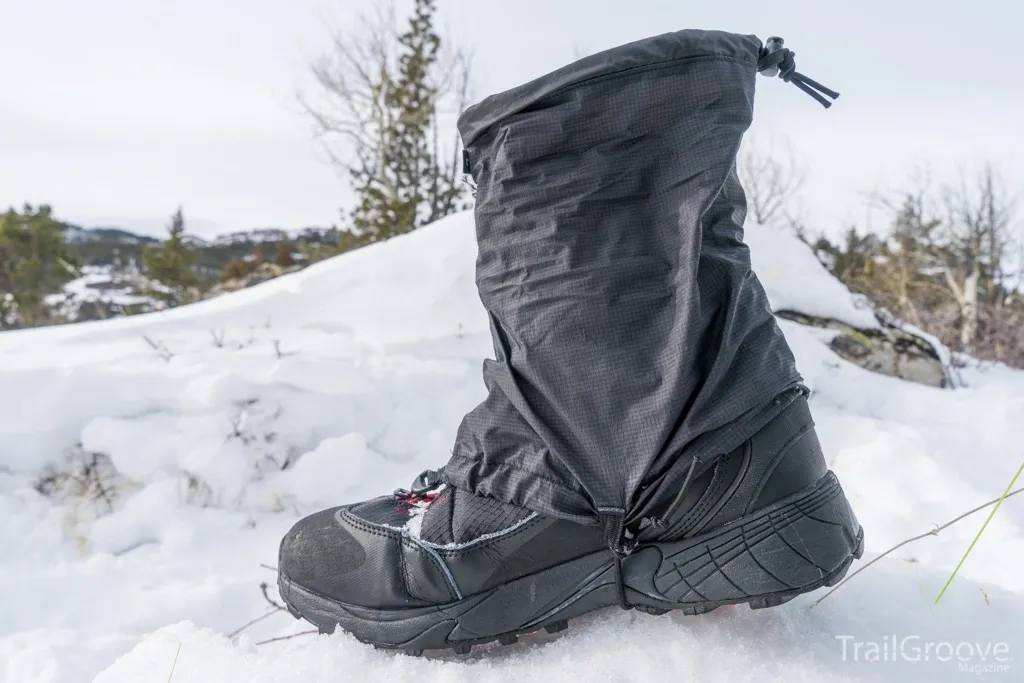
Foot care becomes paramount when winter tent camping, starting with appropriate footwear choices.
Choosing Insulated Boots
For cold-weather expeditions, select boots with synthetic insulation measured in grams—more grams means greater warmth for colder temperatures. Many winter boots state these numbers directly, ranging from 200g for active use to 400g for extreme conditions. Look for waterproof membranes like GORE-TEX or Hydroseal with seam-sealed construction to prevent moisture infiltration. Ensure boots fit properly with room for thick socks—try them on wearing the exact socks you’ll use while camping. Furthermore, consider boots with thick soles that keep your feet elevated from frozen ground.
Why Gaiters Matter
Gaiters provide crucial protection by covering the vulnerable tops of footwear. These attachments prevent snow, water, and debris from entering your boots even in deep conditions. Tall knee-length gaiters (15-18 inches) excel in rugged winter environments and deep snow, whereas mid-calf options (8-12 inches) work for moderate conditions. For optimal performance, gaiters should fit snugly around boots and calves to create an effective seal.
Keeping Feet Dry and Warm
First and foremost, choose merino wool socks that retain warmth even when damp. Avoid cotton completely as it absorbs moisture. Along with proper socks, maintaining core temperature helps prevent blood from being diverted away from extremities. For extended trips, bring multiple sock pairs to ensure you always have dry options.
Headlamp with Extra Batteries
Reliable illumination becomes a lifeline in the extended darkness of winter tent camping, where daylight hours shrink drastically and early sunsets occur.
Why Headlamps Are Critical
Headlamps serve as essential equipment for winter camping expeditions, providing hands-free lighting for tasks from cooking to emergencies. As darkness falls early during winter months, quality lighting becomes paramount after shelter and clothing considerations. In emergency situations, headlamps can be lifesaving tools, particularly if you’re injured or need to assist others after sunset. Waterproof models resist harsh winter precipitation plus function reliably in snow conditions.
Battery Life in Cold Weather
Cold temperatures dramatically reduce battery efficiency, causing premature depletion. Lithium batteries consistently outperform other types in frigid conditions, making them ideal for winter excursions. For optimal performance, store batteries close to your body when not in use—this maintains their warmth. Remember that lithium-ion batteries perform poorly below 45°F, yet still function between -4°F to 140°F. Rechargeable headlamps offer significant advantages for cold-weather use over alkaline-powered models.
Backup Lighting Options
Always carry multiple battery sets stored against your body for warmth. Consider models offering dual power sources—the Black Diamond Spot 400 accepts both rechargeable packs and standard AAAs. Headlamps with rear battery compartments allow you to wear beanies over them, preserving heat. Some advanced models feature integrated emergency SOS settings that flash distress signals.
Navigation Tools
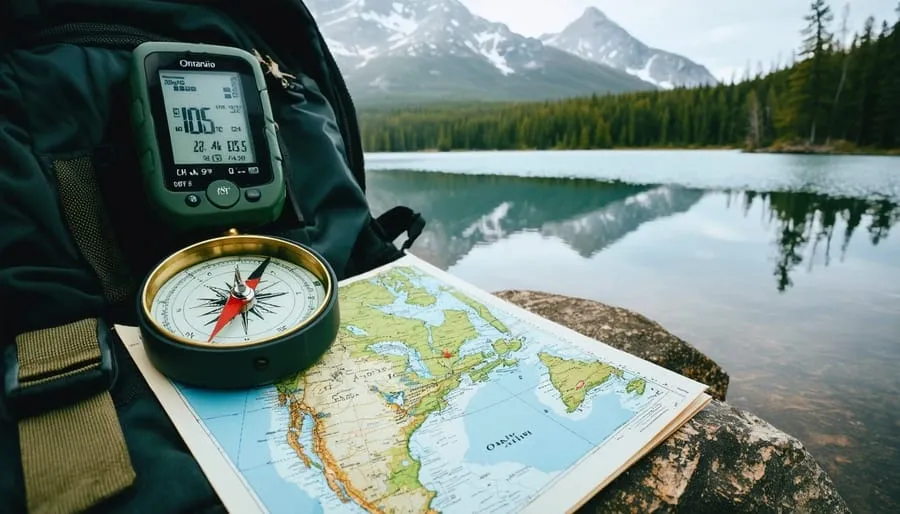
Navigating snow-covered terrain presents unique challenges as familiar landmarks disappear beneath winter’s blanket.
Map, Compass, and GPS
Traditional navigation tools remain irreplaceable for winter tent camping. Paper maps require no batteries and function reliably regardless of temperature. A magnetic compass serves as your constant bearing reference. GPS devices offer precision while smartphone apps provide convenience, yet combining all three creates the most robust system. Remember that navigation is among the Ten Essentials systems for outdoor safety.
Why Electronics Can Fail
Electronic devices prove vulnerable in winter conditions. A survey of 4,000 hill walkers revealed that while 87% used phones or GPS for navigation, over 40% experienced device failures. Cold temperatures dramatically reduce battery life, screens can ice up, and touchscreens become unusable with thick gloves. Dense tree cover or canyon walls frequently block satellite signals.
Tips for Staying on Track
Carry multiple navigation tools as insurance against failures. Store electronic devices close to your body to preserve battery life. Enable flight mode on smartphones—GPS will still function while extending battery capacity. Download all necessary maps before departure for offline access. In poor visibility, trust your compass readings after double-checking bearings. Create a mental checklist of landmarks to confirm your position throughout your journey.
Avalanche Safety Gear
Safety preparation becomes even more critical as winter tent camping adventures extend into avalanche-prone territories. The right equipment can make the difference between life and death in emergency situations.
Beacon, Probe, and Shovel
The “Big Three” avalanche safety tools work as an integrated system for companion rescue. Avalanche transceivers (beacons) transmit radio signals at 457 kHz frequency, allowing rescuers to locate buried victims. Modern digital beacons feature three antennas for increased accuracy and signal strength. Probes—collapsible pole-like tools extending to 240-320cm—help pinpoint a victim’s exact location after the beacon search. Shovels must have metal blades as plastic versions can break in hard avalanche debris. Furthermore, each member of your group must carry all three items—not just one or two.
When You Need Avalanche Gear
Carry avalanche safety equipment whenever traveling in avalanche terrain, even for short excursions. Remember that satellite messengers or personal locator beacons, as helpful as they are for summoning help, cannot replace the essential rescue tools. In essence, avalanche gear becomes necessary anytime you’re in terrain where snow might slide, not just during high-risk periods.
Training and Practice Tips
With only 10 minutes to effectively rescue a buried victim, practice becomes non-negotiable. Master systematic probing techniques, including spiral patterns with probes held perpendicular to the snow surface. Learn strategic shovelling—starting about 1.5x the burial depth downhill from the probe strike. For effective digging, excavate laterally rather than vertically, moving snow only once. Most importantly, practice regularly before and throughout the winter season with your specific equipment.
Personal Hygiene Kit
Maintaining personal cleanliness becomes unexpectedly challenging yet crucial during winter tent camping excursions, as cold conditions don’t eliminate bodily processes.
Toiletries for Cold Weather
Pack travel-sized essentials in your hygiene kit: hand sanitizer, biodegradable soap, quick-drying towel, toothbrush, and toothpaste. Most importantly, include moisturizing lotion to prevent skin from drying out in harsh conditions. Face wipes allow for basic cleanliness between proper washing opportunities. Always keep these items stored properly—outside your tent and inside your vehicle whenever possible, as they can attract wildlife.
Pee Bottles and Trowels
For midnight necessities, designate a clearly marked wide-mouth bottle so you won’t need to leave your tent. The Nalgene Wide Mouth Canteen (48oz) excels as it can hold 3-4 uses before emptying. As an added benefit, after use, a sealed bottle can function as a makeshift bed warmer inside your sleeping bag. For solid waste, pack a sanitation trowel to dig proper cat holes in accordance with Leave No Trace principles.
Staying Clean in the Snow
First, frequently change socks—sweat accumulates underneath layers even in cold weather. Clean your hands before meals and after handling ground-touching gear. For hygiene “down there,” use wipes daily until proper showering becomes available.
Conclusion
Winter tent camping demands meticulous preparation and specialized equipment beyond what casual warm-weather outings require. Proper gear selection makes the difference between a memorable adventure and a potentially dangerous situation. The fifteen essential items detailed above work together as an integrated system to protect you from extreme cold, manage moisture, and ensure your safety in challenging winter conditions.
Your shelter system—comprising a four-season tent, cold-weather sleeping bag, insulated pad, and liner—creates a critical defense against freezing temperatures. Cooking and hydration tools allow you to maintain proper nutrition and fluid intake when natural water sources remain frozen. Layered clothing from base to outer shell, along with specialized hand and foot protection, keeps your body warm while managing perspiration that could otherwise lead to dangerous cooling.
Navigation tools, headlamps, and avalanche safety equipment address the unique risks that winter environments present. Even seemingly mundane items like hygiene supplies gain importance during extended cold-weather expeditions.
Though winter camping requires additional planning and equipment, the rewards justify these efforts. Pristine snow-covered landscapes, unparalleled solitude, and crystal-clear night skies await those willing to venture out during the coldest months. Armed with appropriate gear and knowledge, you can transform challenging winter conditions into safe and unforgettable outdoor experiences.
Remember that quality equipment serves as your foundation for winter adventures, yet knowledge of how to use that gear effectively remains equally important. Practice setting up your tent in windy conditions before your trip. Test your stove’s performance in cold weather. Understand how your layering system works together. This preparation, combined with the right equipment, ensures your winter camping experiences remain memorable for all the right reasons.