As you learn to camp for the first time, unexpected challenges can quickly turn your wilderness adventure into a stressful experience. While the great outdoors offers countless rewards, the reality is that nature doesn’t always cooperate with your plans. In fact, injuries can ruin a camping trip if you’re not prepared for wilderness first aid.
First time camping requires preparation for situations beyond your control. From bears searching for food in your campsite to sudden weather changes flooding your tent, camping for beginners involves anticipating potential problems. Fortunately, with the right camping tips and advance planning, you can handle these outdoor surprises with confidence. This camping 101 guide covers five common challenges that might occur during your outdoor adventure—not because you made mistakes, but simply because camping sometimes throws unexpected situations your way.
It Gets Unexpectedly Cold at Night
The tranquil evening campfire often lulls first-time campers into a false sense of security, right before temperatures plummet after sunset. Even during summer months, nighttime temperatures in many camping areas can drop significantly compared to daytime readings. Consequently, one of the most common camping challenges occurs when your peaceful slumber is interrupted by teeth-chattering cold.
When you’re sleeping, your body naturally produces less heat than during active hours. Additionally, the ground beneath your tent absorbs your body heat through conduction, making you feel even colder. This temperature drop catches many beginners off guard, especially those who packed based on daytime forecasts rather than overnight lows.
How to be prepared
Preparing for cold nights starts with understanding temperature ratings on sleeping bags. Most quality sleeping bags come with standardized ratings, yet these numbers can be misleading. A 20-degree bag doesn’t necessarily mean you’ll be comfortable at 20°F—that’s often the “limit” rating rather than the “comfort” rating. For actual comfort, select a sleeping bag rated at least 10°F warmer than the coldest temperatures you expect to encounter.
Your choice of sleeping pad is equally crucial. The ground acts as a massive heat sink, constantly drawing warmth from your body. Sleeping pads are rated using an “R-value”—a measurement of insulation effectiveness. For three-season camping, look for pads with R-values between 3-4. If temperatures might drop to 15°F or lower, choose a pad with an R-value above 4.
Essential cold-weather sleeping gear:
- Sleeping bag rated at least 5-10°C lower than expected temperatures
- Sleeping pad with appropriate R-value (minimum R-value of 4 for cold conditions)
- Liner for your sleeping bag (can add 5-25°F of warmth)
- Non-cotton base layers and wool socks
- Insulated water bottle
Before climbing into your sleeping bag, ensure your body is already warm. Many camping experts recommend performing light exercise—fifty jumping jacks or a quick jog around camp—right before bed. Furthermore, eating a small snack shortly before sleeping helps generate internal heat as your body digests the food.
One highly effective wilderness hack for staying warm involves creating your own heating element. Boil water and carefully pour it into an uninsulated water bottle (like a Nalgene), then place this inside your sleeping bag near your core, inner thighs, or feet. The bottle will radiate heat throughout the night, essentially creating a portable heater that requires no electricity or batteries.
Equally important is managing moisture inside your tent. Although it might seem logical to seal every vent on a cold night, this traps humidity from your breath, eventually creating condensation that will make you damp and colder. Instead, slightly crack a vent at the top of your tent to allow airflow without creating a draft.
When selecting your campsite, look for natural windbreaks such as tree clusters or ridges. Moreover, positioning your tent to catch the morning sun can make waking up significantly more pleasant. These simple site selection strategies can make a substantial difference in your overnight comfort.
Your clothing strategy plays a vital role in temperature regulation. Rather than wearing every layer at once, sleep in clean, dry base layers made from merino wool or synthetic materials—never cotton, which retains moisture and draws heat away from your body. Also, keep tomorrow’s clothing inside your sleeping bag overnight. This serves two purposes: filling empty space in your bag (reducing the air your body needs to heat) and ensuring you’ll have warm clothes to put on in the morning.
Should you wake up cold during the night, several techniques can help. First, don’t delay emptying your bladder if nature calls; your body expends energy keeping that liquid warm. Second, keep an emergency snack like energy chews or a candy bar within reach—consuming calories kickstarts your metabolism and generates heat.
For extremely cold conditions, consider placing your electronics, water bottles, and fuel canisters in your sleeping bag. Cold temperatures can drain batteries quickly and freeze water, causing additional problems when you wake. Nevertheless, be careful not to breathe directly into your sleeping bag, especially if it contains down insulation—the moisture from your breath can significantly reduce its insulating properties.
Rather than viewing unexpected cold as a camping crisis, consider it an opportunity to experience the profound stillness that often accompanies chilly nights in nature. With proper preparation, you’ll sleep comfortably regardless of temperature drops, allowing you to wake refreshed and ready for your next day of exploration.
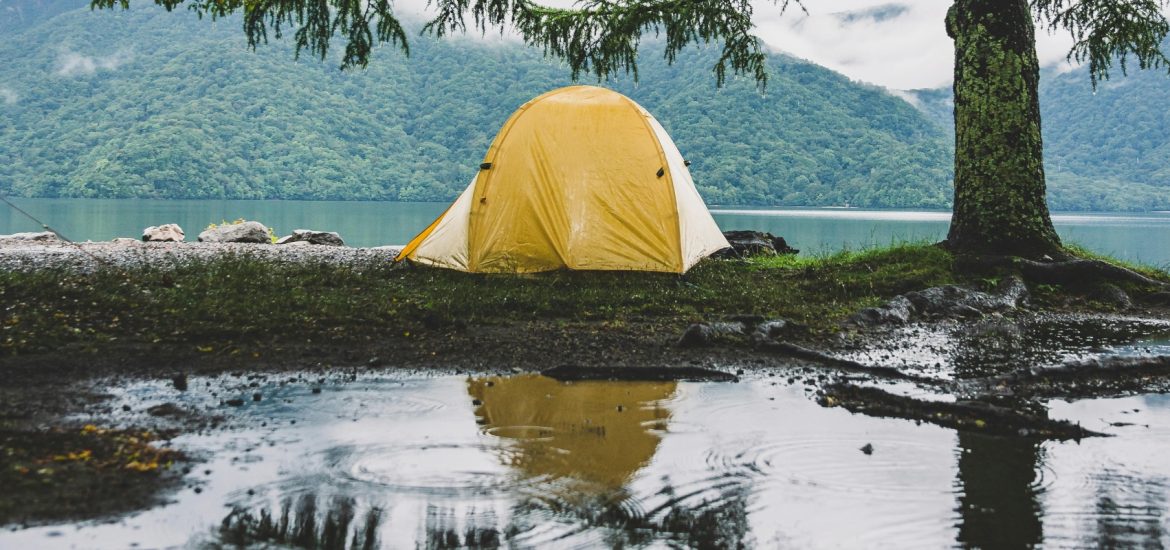
Heavy Rain Floods Your Tent
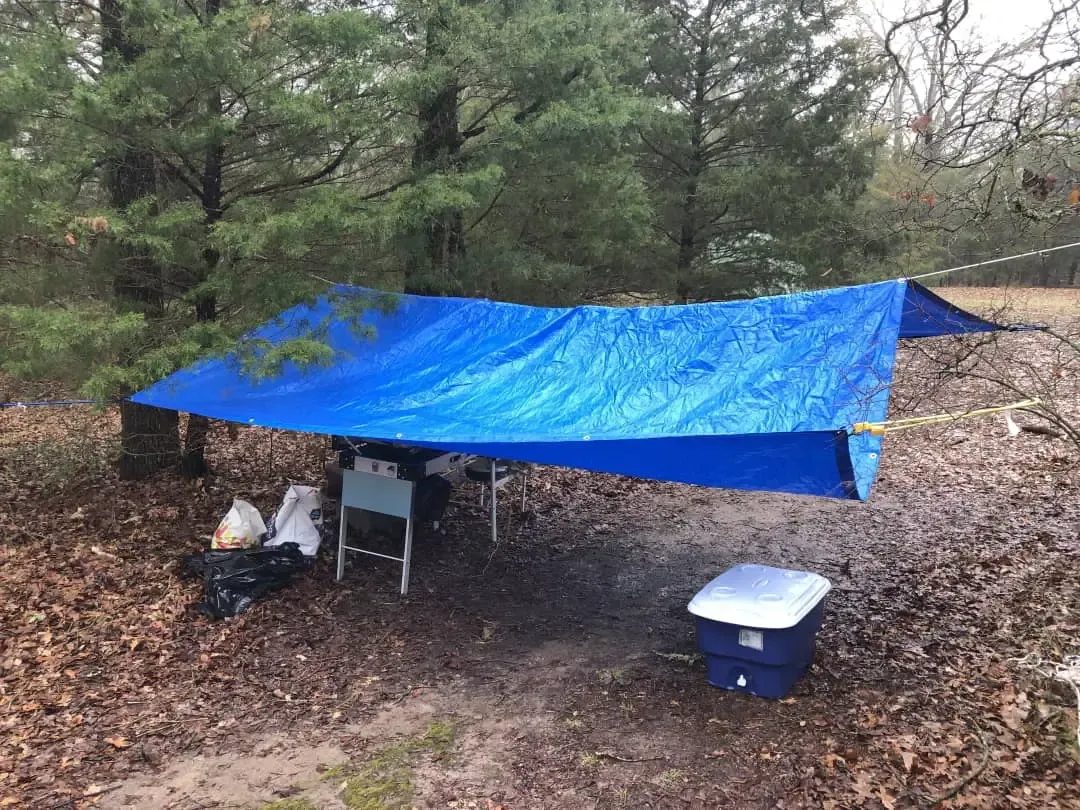
Image Source: Camping Forge
Unexpected rainstorms can transform your peaceful camping retreat into a survival scenario when water starts seeping—or worse, rushing—into your tent. Even experienced campers occasionally find themselves dealing with the unpleasant reality of a flooded sleeping area. This situation typically occurs not because you’ve done anything wrong, but simply due to nature’s unpredictable patterns, particularly in regions prone to sudden downpours.
When rainwater floods your tent, it can damage your sleeping gear, electronics, and personal items. Moreover, sleeping in wet conditions increases the risk of hypothermia, even during warmer seasons. The psychological impact shouldn’t be underestimated either—trying to sleep while water drips on your face or feeling moisture soak through your sleeping bag can quickly diminish any camping enthusiasm, particularly for first-time campers.
How to be prepared
Choose your campsite strategically
Site selection represents your first line of defense against flooding. When learning to camp, avoid setting up in depressions or at the bottom of slopes where water naturally collects. Instead, look for slightly elevated ground with good drainage. Likewise, maintain a safe distance from rivers, lakes, or streams that might flood during heavy rainfall. Experienced campers carefully examine the terrain for evidence of past water flow before settling on a location.
Additionally, inspect the area above your potential site—camping beneath runoff from cliffs or rocks guarantees a wet night during rainfall. Steer clear of dry riverbeds as well, since these can transform into rushing waterways during storms, sometimes without warning.
Groundsheet essentials
A groundsheet (sometimes called a footprint) provides critical protection against flooding. This waterproof layer sits beneath your tent, creating a barrier between your shelter and the ground. Without one, even light rain can seep through your tent floor, leaving you with a soggy sleeping area.
When using a groundsheet or tarp under your tent, ensure it doesn’t extend beyond your tent’s edges. Otherwise, it will collect rainwater like a pool underneath you. The correct approach involves either:
- Using a purpose-made footprint sized specifically for your tent model
- Folding excess tarp material under the tent rather than letting it stick out
Employ overhead tarps
For additional protection, suspend a tarp above your tent without letting it touch the tent surface. This creates an extra waterproof layer that diverts rainfall away from your shelter. When setting up this tarp system:
Position the tarp at a slight angle so water runs downhill away from your tent, not toward it. Secure it tightly using paracord or guy lines, making sure the high point faces away from prevailing winds to prevent the tarp from being carried away during storms.
Maintain your tent’s waterproofing
Even high-quality tents gradually lose their water resistance. After every few camping seasons (typically two to three years of regular use), check your tent’s waterproofing by spraying it with water. If water soaks into the fabric rather than beading up and rolling off, it’s time to reapply waterproofing treatment.
Prior to reapplication, clean your tent thoroughly and ensure it’s completely dry. Subsequently, apply a suitable waterproofing product—silicone-based sprays work well for nylon or polyester tents, whereas acrylic-based solutions better suit canvas varieties. Pay special attention to the rainfly and seams, as these areas prove most vulnerable to leakage.
Set up your tent properly
A properly tensioned tent sheds water more effectively. When pitching your tent:
- Keep the rainfly taut so water runs off instead of pooling
- Secure all guy lines at opposing angles to maintain tension
- Position your tent entrance away from the wind direction to minimize rain entry
- Utilize all available stake points for maximum stability
Pack essential flood-management gear
Certain items help mitigate flooding issues:
- Waterproof stuff sacks or dry bags to protect electronics and clothing
- Extra tarps for emergency coverage
- Paracord for emergency rigging
- Towels for soaking up unexpected leaks
- Seam sealer for on-site repairs
Create drainage trenches in emergencies
Should unexpected heavy rain begin flooding your campsite despite your preparations, you can dig small trenches around your tent to channel water away. Generally, experienced campers dig a small trench on the uphill side of the tent that directs water around rather than underneath your shelter.
Have a backup plan
Sometimes, despite your best efforts, flooding becomes severe enough that remaining in your tent presents genuine risks. In these situations, knowing when to relocate to your vehicle (if camping with one nearby) or a designated shelter area becomes crucial. Prior to your trip, identify emergency options should extreme weather force you to abandon your campsite.
Undoubtedly, heavy rain can temporarily dampen your camping experience. Nevertheless, with proper site selection, equipment, and preparation, most rainfall events become manageable rather than trip-ending disasters. Furthermore, once you’ve successfully weathered your first rainstorm, you’ll gain confidence in your ability to handle whatever weather challenges come your way during future camping adventures.
Wild Animals Wander Into Your Campsite
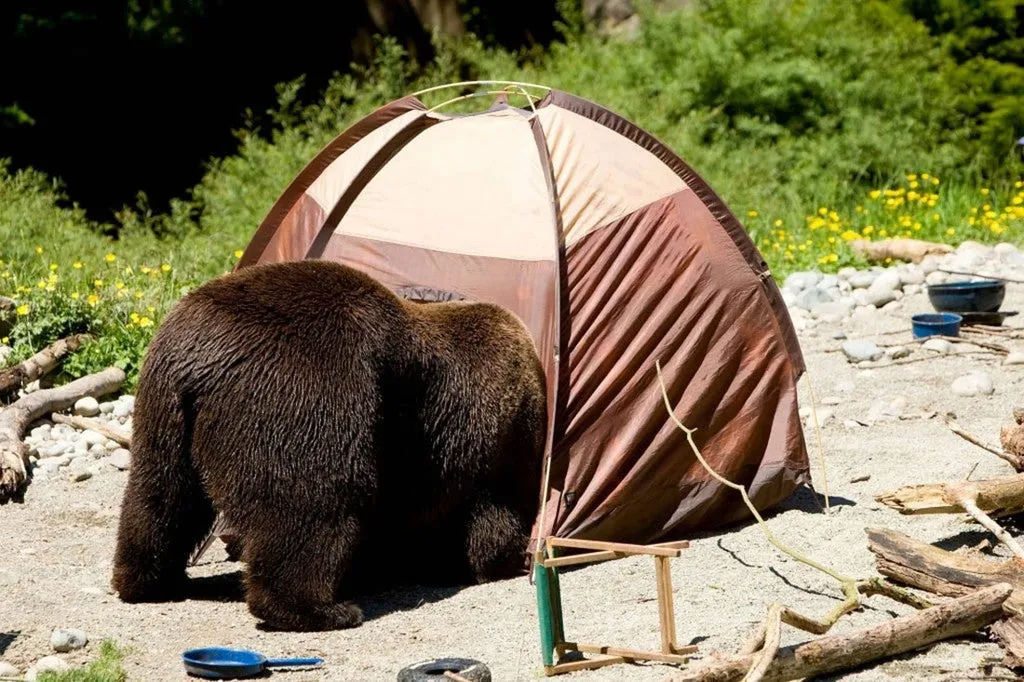
Image Source: Cascadia Vehicle Tents
Curious wildlife investigating your campsite is a natural part of the backcountry experience—yet nothing disrupts sleep faster than hearing something rustling through your belongings just outside your tent. For first-time campers, such wildlife encounters can range from minor nuisances (like raccoons examining your cooler) to potentially dangerous situations when larger animals like bears decide to explore your sleeping area.
Wildlife approaches campsites primarily because of one thing: food scents. Even when you think you’ve been careful, animals’ powerful sense of smell can detect food particles, toiletries, and scented items that humans might not notice. These encounters don’t occur because you’ve done anything wrong—animals naturally explore their territory, and your campsite temporarily falls within it.
How to be prepared
Choose your campsite strategically
Site selection forms your first defense against unexpected animal visitors. When learning to camp, avoid pitching your tent near animal trails, berry patches, or dense vegetation where wildlife frequently travels. Instead, look for established campsites that sit at least 200 feet away from trails and water sources where animals gather.
If you’re backcountry camping, position your tent at least 50 meters from thick brush and berry patches, and approximately 70 meters from the nearest water source. This distance helps minimize the chance of animals stumbling upon your sleeping area while following their regular routes.
Create a scent-free zone
Your sleeping area should remain completely free of anything that might attract wildlife:
- Keep sleeping bags, tents, and sleeping clothes free of food particles and scents
- Leave scented cosmetics at home—even items like perfumed lotions or deodorants can attract curious animals
- Store toiletries with your food, not in your tent
- Set up your cooking area at least 50 meters downwind from your tent when in the backcountry
Master proper food storage
Improper food storage ranks as the number one reason wildlife approaches campsites. Different camping locations require different storage methods:
For car camping, store all food and scented items in your locked vehicle overnight or in metal bear lockers if provided at the campground. Never leave coolers, food containers, or trash accessible outside your vehicle after cooking.
In backcountry settings, store food using bear-resistant containers (mandatory in many national parks) or hang food bags from trees or poles using the proper technique. This means suspending food at least 4 meters above ground and 2 meters away from the trunk or support.
Clean thoroughly after meals
Following meals, wash dishes promptly using biodegradable soap, making sure to strain food particles from dishwater. Subsequently, dispose of dishwater in designated areas or at least 50 meters from your sleeping area—never near your tent. Pack out all garbage rather than burying or burning it, as both methods can leave scent traces that attract animals.
Make your presence known
When hiking to and from your campsite or moving around your camp area:
- Make noise through conversation, singing, or occasionally clapping hands
- Avoid using headphones so you can hear approaching wildlife
- Travel in groups whenever possible, as larger parties naturally create more noise
- Hike primarily during daylight hours, avoiding dawn, dusk, and night when many animals are most active
Bring appropriate safety equipment
For camping in bear country, carry bear spray and learn how to use it effectively before your trip. Likewise, consider bringing motion-activated lights to place around your campsite perimeter—these can startle and deter animals from approaching during nighttime hours.
Respect wildlife boundaries
Should you encounter wildlife despite your precautions, maintain a safe distance. National parks typically recommend staying at least 100 yards (91 meters) from bears and wolves, and 25 yards (23 meters) from all other wildlife. Allow animals clear escape routes and avoid positioning yourself between mothers and their young.
Under no circumstances should you attempt to feed, approach, or photograph wildlife from close range. Even seemingly harmless animals can become dangerous when they feel cornered or threatened.
Watch for warning signs
Staying alert to wildlife indicators helps prevent surprise encounters. Learn to recognize animal signs such as fresh tracks, droppings, or newly scraped soil and tree bark. Upon noticing these signs, increase your noise level, keep your group close together, and consider relocating to another area if the signs appear very recent.
First-time camping experiences occasionally include wildlife encounters, yet with proper preparation, these moments transform from potential emergencies into respectful coexistence with nature. Through strategic campsite selection, proper food handling, and maintaining awareness, you’ll minimize unexpected wildlife visits while gaining confidence in your outdoor skills.
You Get Lost While Exploring the Area
Even with careful planning, unfamiliar terrain and winding trails can quickly disorient first-time campers. Stepping just a few minutes off your intended path might suddenly leave you uncertain which direction leads back to camp. This disorientation isn’t necessarily your fault—dense forests, rolling hills, and similar-looking landscapes naturally challenge human navigation abilities.
Nature’s everchanging conditions further complicate orientation. A clear trail visible during daylight might become indistinguishable at dusk, and familiar landmarks can disappear in fog or heavy rain. For camping beginners, these situations can trigger panic, which in turn often leads to poor decisions that compound the problem.
How to be prepared
Prevention remains your strongest ally against getting lost. First, always carry reliable navigation tools and understand how to use them properly. Indeed, experienced campers recommend carrying multiple navigation methods:
- Physical map and compass (that doesn’t rely on batteries)
- GPS device or smartphone with offline maps downloaded
- Portable battery pack for electronic devices
- Small emergency whistle
- Bright flashlight or headlamp with extra batteries
Notably, while GPS devices and smartphones offer convenience, they can fail due to battery depletion or lack of signal. Therefore, mastering traditional map and compass skills provides an essential backup. Before your first camping trip, practice basic compass reading and map orientation at a local park.
In addition to carrying proper tools, thorough trip planning significantly reduces your chances of becoming lost. Study your intended camping area beforehand, noting major landmarks, trail intersections, and potential hazards. Furthermore, during your hike, periodically look behind you—trails often appear dramatically different when viewed from the opposite direction.
As a matter of fact, your pre-trip preparation should include informing someone reliable about your exact plans. Provide them with details about your camping location, expected duration, and when you should return. This ensures that help can be sent if you don’t check in by an agreed time.
Once on the trail, stay alert to your surroundings. As opposed to hiking while distracted by conversations or music, regularly identify landmarks that match your map. Pay attention to terrain features like streams, ridges, or distinctive trees that can serve as reference points should you need to backtrack.
What to do if you get lost
If you realize you’ve become disoriented, immediately stop moving. In the first place, continued wandering typically worsens your situation by taking you further from familiar territory. At this moment, remember the STOP method used by wilderness experts:
Stop: Remain where you are and resist the urge to keep moving.
Think: Review how you got to this point and consider your last known location.
Observe: Check your map and compass, look for landmarks, and assess your surroundings.
Plan: Based on your assessment, determine your next steps carefully.
Primarily, staying put often represents your safest option, especially if daylight is fading or weather conditions are deteriorating. In the long run, making camp where you are and waiting for morning light frequently proves wiser than risking further disorientation or injury by continuing to wander.
Should you need to signal for help, three short whistle blasts represent the universal distress signal. Repeat this pattern periodically while conserving energy. For those in open areas, laying out brightly colored equipment in a clearing creates visibility for potential aerial searchers.
Under those circumstances where you must attempt to reorient yourself, climbing to higher ground might help identify landmarks—but only if doing so is safe. Rivers and streams typically flow downhill and often lead to civilized areas, though following them can sometimes lead to dangerous terrain.
Above all, maintain a positive mental attitude. Panic depletes energy and clouds judgment, thereby reducing your ability to make sound decisions. Remember that most lost campers are found within 24 hours when they’ve informed others of their plans.
For first time camping experiences, getting temporarily disoriented serves as a valuable learning opportunity rather than a failure. In time, with experience and preparation, you’ll develop an intuitive sense of direction in outdoor settings that will serve you well throughout your camping adventures.
You Experience a Medical Emergency
Medical emergencies don’t schedule appointments, especially during remote camping adventures where professional help might be hours away. From sudden illnesses to unexpected injuries, health issues can arise regardless of your camping experience or preparation level. For first-time campers, the isolation of wilderness settings amplifies the seriousness of even minor medical situations.
The remoteness of camping locations presents the primary challenge when facing medical issues. Unlike at home, you can’t simply call an ambulance and expect rapid assistance. Accordingly, your ability to handle medical situations becomes critical, yet many beginners underestimate this aspect of outdoor adventure preparation.
Whenever camping in wilderness areas, your body faces unique environmental challenges. Dehydration can develop rapidly during hikes, especially in warm weather. Heat exhaustion or heat stroke might occur as temperatures rise, presenting with symptoms like dizziness, confusion, headache, and red or hot skin. Conversely, hypothermia becomes a risk in cold conditions, initially showing as shivering and poor coordination before progressing to more serious symptoms.
Besides environmental hazards, common camping injuries include cuts from knives or tools, burns from campfires, sprains from uneven terrain, and allergic reactions to plants or insects. After all, these incidents don’t discriminate between novice and experienced campers—they simply happen, regardless of skill level.
When to seek immediate help:
- Severe bleeding that won’t stop
- Deep wounds showing signs of infection (redness, swelling)
- Head injuries with confusion, vomiting, or loss of consciousness
- Severe allergic reactions with breathing difficulties
- Heat stroke with confusion or unconsciousness
- Hypothermia where shivering suddenly stops
- Cardiac symptoms including chest pain or shortness of breath
Firstly, prevention serves as your best defense against medical emergencies. Secondly, rapid response becomes your most valuable tool when prevention fails. Given these points, preparation before your trip yields the greatest benefits.
Consider taking a wilderness first aid course before your camping adventure. These specialized classes teach emergency response techniques specifically for remote settings where medical assistance may be delayed or unavailable. Meanwhile, download first aid apps on your phone that provide guidance even without cell service.
Creating a comprehensive first aid kit represents an essential step in camping preparation. Unlike urban settings where pharmacies exist nearby, wilderness locations require you to carry everything you might need. Henceforth, your camping first aid supplies should include:
- Basic supplies: Adhesive bandages, gauze pads, medical tape, antiseptic wipes, tweezers, scissors
- Medications: Pain relievers, antihistamines, anti-diarrheal medication, personal prescriptions
- Emergency items: Emergency blanket, CPR mask, splint materials, insect repellent
- Specialized tools: Irrigation syringe for wound cleaning, hemostatic gauze for severe bleeding
Prior to departure, inform someone reliable about your exact camping location and expected return time. Create an emergency plan that identifies the nearest medical facilities to your camping area. Moreover, research whether the camping region has cell coverage or requires alternative communication devices like satellite messengers.
In case someone experiences a medical emergency like a heart attack or stroke while camping, having aspirin on hand can make a significant difference. Throughout your camping trip, stay vigilant about hydration status and watch for early symptoms of environmental illnesses among your group members.
Remember that taking prompt action during emergencies saves lives. Having practical knowledge combined with appropriate supplies transforms potential disasters into manageable situations, allowing your first camping trip to remain a positive experience despite unexpected health challenges.
Essential first-aid items to bring
A well-stocked first aid kit serves as the foundation of wilderness medical preparedness, yet many novice campers underestimate which supplies they’ll actually need when far from professional healthcare. Preparing for injuries or illnesses requires thoughtful consideration of what might occur during your outdoor adventure.
Your camping first aid kit should include these essential items:
Basic wound care supplies:
- Adhesive bandages in various sizes
- Antibacterial ointment and antiseptic wipes[261]
- Gauze pads and rolls[261]
- Medical tape and butterfly bandages
- Tweezers for splinter removal[261]
- Scissors (with rounded tips for safety)[261]
- Disposable gloves to prevent infection[261]
Beyond wound management, include medications that address common camping ailments. Pack anti-diarrheal medication, as intestinal issues frequently occur when traveling[261]. Antihistamines help manage allergic reactions to unfamiliar plants or insects[261]. Pain relievers like ibuprofen or acetaminophen handle everything from headaches to muscle soreness.
Importantly, environmental emergencies require specialized items. An emergency blanket reflects body heat and prevents hypothermia. Hydrocortisone cream soothes rashes and insect bites. Burn gel treats minor cooking accidents.
First and foremost, customize your kit based on your specific health needs. For those with known allergies, an epinephrine auto-injector becomes non-negotiable. Prescription medications should always be packed in their original containers with proper labeling.
Consider these often-overlooked but valuable additions:
- Irrigation syringe for cleaning wounds thoroughly
- Oral glucose tablets for low blood sugar emergencies
- Dental relief gel for unexpected tooth pain
- SAM splint for immobilizing injuries
- CPR mask for emergency resuscitation
Beforehand, ensure everyone in your camping group knows where the kit is stored and how to use its contents. Throughout your camping journey, keep the kit easily accessible yet protected from the elements. After all, even the most comprehensive kit proves useless if soaked by rain or damaged by heat.
Storage matters almost as much as contents—keep your supplies in a waterproof container clearly marked as a first aid kit. At the same time, taking a wilderness first aid course before your camping trip dramatically increases your ability to effectively use these supplies when emergencies arise.
Between trips, check expiration dates and replace used or outdated items promptly. Over time, your understanding of which supplies you actually use will help refine your kit for future camping adventures.
Beginners entering the world of camping often discover that outdoor adventures come with both planned and unplanned components. Every seasoned camper has stories about their early mishaps—these experiences ultimately become valuable parts of your camping education.
Throughout this guide, we’ve examined common situations that might challenge you during your first camping trip. Hence, proper preparation becomes your greatest ally when facing these outdoor hurdles. On balance, most camping challenges respond well to advance planning and bringing appropriate gear.
Consider creating a comprehensive camping checklist that addresses each potential challenge:
Weather Preparation
- Multi-season sleeping bag rated for temperatures lower than forecasted
- Quality rainfly and waterproof groundsheet
- Appropriate layered clothing
Navigation Safety
- Physical maps alongside digital navigation
- Headlamp with spare batteries
- Whistle and signaling mirror
Wildlife Management
- Proper food storage containers
- Camp kitchen located away from sleeping area
- Basic understanding of local wildlife behavior
Medical Readiness
- Personalized first aid kit
- Knowledge of nearest medical facilities
- Basic wilderness first aid training
In the final analysis, learning to camp resembles most worthwhile skills—it improves with practice and patience. Each trip builds your confidence and expands your outdoor knowledge.
To this end, many beginners find joining experienced campers for initial trips provides valuable mentorship. Alternatively, numerous state parks offer guided programs specifically designed for those learning camping basics.
All things considered, the occasional outdoor challenge merely adds dimension to your camping story. From this point forward, each trip will build upon lessons learned from previous experiences. Ultimately, the unpredictable nature of outdoor adventure creates the very memories that keep campers returning to nature year after year.
The wilderness offers powerful rewards that far outweigh temporary discomforts. With preparation, resilience, and a positive attitude, your first camping trip can launch a lifetime of meaningful outdoor connections—occasional challenges included.