Did you know that understanding shutter count meaning could save you from buying a camera that’s on its last legs? Professional camera models are typically rated for 300,000 shots, while enthusiast models often max out around the 150,000-shot mark.
I’ve been purchasing used photography equipment for over 30 years, and one question consistently tops my list: “What is a good shutter count?” In fact, when selling my own gear, this is usually the first thing potential buyers ask. Generally, fewer than 10,000 shots on a 2-5 year old camera is considered very low usage, while the normal range falls between 30,000-50,000. However, when you spot a camera with 100,000+ actuations, it’s usually best to walk away—unless you’re prepared for a potential $350 shutter replacement down the line.
Before handing over your hard-earned cash for used camera equipment, there’s more to check than just the shutter count. From inspecting for scratches on the LCD screen to listening for concerning rattles when gently shaking the body, these small details can reveal a camera’s true condition. Additionally, verifying that serial numbers are intact helps ensure you’re not purchasing stolen or counterfeit gear.
In this comprehensive guide, we’ll walk through the essential steps for buying used camera equipment—from researching prices to making that final keep-or-return decision.
Step 1: Research and Price Check
Researching the used camera market first saves both money and heartache. Buying used can get you 90% of the quality of new gear at just 60% of the price. Furthermore, the used camera market currently favors buyers, making it an excellent time to upgrade your gear.
Compare prices across platforms
When starting my research, I always check multiple sources to establish fair market value. Over the past 36 months, used mirrorless camera prices have dropped approximately 17% in the US, whereas DSLRs have declined by about 35%. To get accurate pricing:
- Check dedicated used camera indexes like MPB’s Used Camera Gear Price Index
- Compare prices across major retailers (KEH, Adorama, B&H Photo, MPB)
- Review recent sold listings on auction sites
Specifically, certain brands retain value better than others. Canon, particular Fujifilm models, and Leica cameras typically hold their value, whereas Sony, Panasonic Lumix, and some Nikon bodies depreciate more quickly.
Understand condition ratings
Each retailer uses its own grading system, making it crucial to understand what you’re actually buying. For instance, KEH employs an eight-point scale ranging from “New” to “As Is”, whereas Camera Jungle uses a simpler four-point scale: Mint, Excellent, Good, and Well Used.
Most reputable retailers include detailed descriptions explaining what each grade means. A “Like New” or “Mint” camera should show virtually no signs of use, whereas “Excellent” or “Good” grades might have minor cosmetic wear yet remain fully functional.
Avoid deals that seem too good to be true
If a price appears unusually low, there’s likely a reason. During my years of buying used equipment, I’ve learned to look for these warning signs:
- Unusually low prices compared to market averages
- Sellers refusing to provide actual photos of the item
- Lack of detailed descriptions about condition
- Missing serial numbers or warranty information
For online purchases, prioritize sellers with established positive feedback. Remember that gray market items might lack factory warranties, hence explaining their lower prices. Ultimately, saving a small amount upfront isn’t worth the potential headache or hidden costs later.
Step 2: Ask the Right Questions
Asking insightful questions separates knowledgeable buyers from those likely to encounter post-purchase regrets. Once you’ve found potential gear at reasonable prices, it’s time to dig deeper into the equipment’s actual condition.
Ask about shutter count and usage
Understanding shutter count meaning is crucial—it’s essentially the camera’s odometer. Professional cameras are typically rated for 300,000 actuations, mid-level models for 150,000, and entry-level bodies for around 50,000. For personal use, approximately 10,000 actuations per year is considered average. Therefore, a camera showing 100,000+ shots deserves extra scrutiny.
Beyond raw numbers, inquire about how the camera was used. A camera primarily used for video might have low shutter count yet suffered from overheating issues. Similarly, sports or wedding photographers typically put more strain on their equipment than landscape photographers.
Check for sensor dust or scratches
Sensor issues can render an otherwise perfect camera unusable. To check for sensor dust, request a test image of a white wall or cloudless sky at a small aperture like f/11 or f/16. Dust appears as small dark spots, which are generally cleanable, but straight parallel lines indicate scratches—permanent damage from improper cleaning attempts.
Inquire about lens fungus or haze
Lens fungus appears as web-like patterns or thread-like formations, often starting at the edges. Meanwhile, haze manifests as cloudiness on internal elements. Both thrive in humid, dark environments. Though minor fungus can sometimes be cleaned, advanced growth may permanently etch lens coatings, reducing contrast and sharpness.
Request photos of actual item
Never purchase sight unseen. Request current photos showing the actual item you’ll receive. For online purchases, ask for a unique verification photo—perhaps including today’s newspaper or specific arrangement—proving the seller actually possesses the item. This simple step helps verify authenticity and current condition simultaneously.
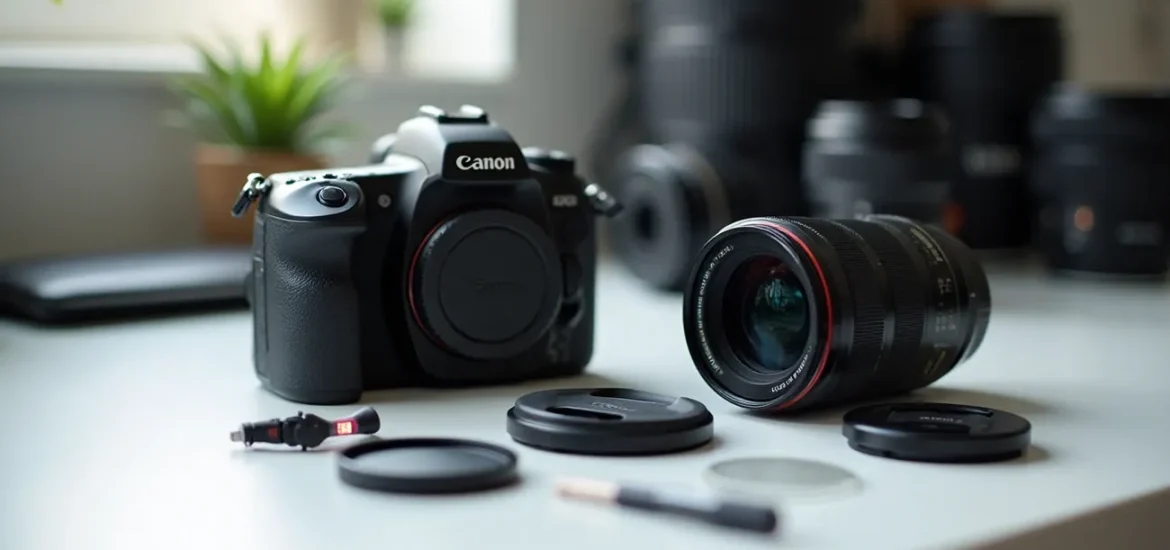
Step 3: Inspect the Gear Thoroughly
Hands-on inspection remains the critical final checkpoint before purchasing used camera gear. No matter how honest a seller seems, seeing potential problems yourself prevents costly mistakes.
How to inspect a used camera body
First, remove the body cap and inspect the camera’s vital components – the mirror, focusing screen, and lens contacts should be free of oil and dirt. Hold the camera facing downward during inspection to prevent dust from entering. Then power on the camera with a test battery and memory card to verify all electronic functions. Press every button and rotate all dials to ensure they operate smoothly without stickiness.
How to inspect a used lens
Examine the lens mount for scratches or bending that might affect connection. Subsequently, check both front and rear glass elements by shining a light through the lens, looking for fungus (web-like patterns), haze (cloudiness), or separation (rainbow-colored crescents). Minor dust is normal, especially in zoom lenses, yet excessive amounts warrant caution.
Test autofocus and aperture blades
To verify autofocus accuracy, set your camera to use a single focus point and capture several test images of both near and far objects. Review each photo at 100% magnification to confirm consistent sharpness. Next, test the aperture by changing settings from widest to smallest, watching for sticky blades or oil spots. The aperture should respond quickly without hesitation.
Use test charts to check sharpness
Resolution test charts provide objective evaluation of lens sharpness. Mount your camera on a tripod, set it to manual mode with the widest aperture, and photograph the chart perpendicular to the lens. Review images at 100% magnification, looking for even sharpness across the frame. Siemens star charts particularly excel at detecting focus accuracy and sharpness falloff toward edges.
Step 4: Decide to Keep or Return
After thorough inspection comes the crucial moment of decision. Despite strong initial attraction to the equipment, objective assessment remains vital for long-term satisfaction.
Evaluate minor vs. major issues
Distinguishing between cosmetic flaws and functional problems is essential. Minor scratches on the body shouldn’t deter purchase, yet they provide leverage during negotiations. Indeed, I often prefer lenses that look worse than they perform! Conversely, avoid gear with serious faults affecting image quality. Dust is typically manageable, whereas sensor scratches indicate improper maintenance. Deep dents or corner damage could reveal previous drops with potential internal damage.
Negotiate a discount if needed
Regardless of culture, bargaining remains standard practice in the used camera market. When discovering minor issues, politely highlight them as negotiation points. A small scratch on the front element might warrant a $140 discount. Sellers typically set prices with negotiation in mind, so don’t hesitate to make reasonable offers. Nevertheless, be realistic – excessive bargaining over minimal flaws wastes everyone’s time.
Know when to return the gear
Undeniably, sometimes returning is the wisest choice. If issues are significant, returning the equipment is often better than attempting repairs. Most reputable retailers offer 30-day return policies, yet read the fine print carefully. Remember that returns require items in the same condition as sold, with all accessories included. Understand that returns exist for genuine dissatisfaction, not as free rental opportunities.
Conclusion
Buying used camera equipment requires caution, patience, and knowledge. Throughout my 30 years of experience, I’ve learned that thorough research before purchase truly pays off. Undoubtedly, understanding shutter count serves as the first critical step, but a complete inspection covers everything from sensor condition to testing autofocus systems. This methodical approach has saved me from countless disappointing purchases while allowing me to build a quality kit at reasonable prices.
Although many photographers fear the used market, following the steps outlined above will significantly reduce your risk. Most importantly, remember that cosmetic imperfections often lead to substantial discounts without affecting image quality. Additionally, certain brands like Canon and Fujifilm tend to hold their value better, which becomes essential knowledge when you eventually decide to upgrade again. After all, photography equipment simply works as a tool – its previous life matters less than its current condition.
Last but not least, trust your instincts during the final decision process. If something feels wrong about a particular camera or lens, walking away is always an option. The used camera market currently favors buyers, therefore another good deal will surely come along. Armed with this comprehensive guide, you now have the knowledge to confidently navigate the used equipment landscape, potentially saving 40% compared to buying new while still getting excellent gear that will serve you for years to come.
FAQs
Q1. What is a good shutter count for a used camera?
A good shutter count depends on the camera model and its intended use. Generally, fewer than 10,000 shots on a 2-5 year old camera is considered very low usage, while 30,000-50,000 is normal. Professional cameras can handle up to 300,000 actuations, while entry-level models may max out around 50,000.
Q2. How can I check for sensor issues when buying a used camera?
To check for sensor issues, request a test image of a white wall or cloudless sky taken at a small aperture (f/11 or f/16). Look for small dark spots, which indicate dust, or straight parallel lines, which suggest scratches. Dust is usually cleanable, but scratches are permanent damage.
Q3. What should I look for when inspecting a used lens?
When inspecting a used lens, examine the mount for scratches or bending, check both front and rear glass elements for fungus (web-like patterns), haze (cloudiness), or separation (rainbow-colored crescents). Also, test the autofocus accuracy and ensure the aperture blades respond quickly without hesitation.
Q4. Is it worth buying a used camera with cosmetic imperfections?
Yes, it can be worth buying a used camera with minor cosmetic imperfections. These often lead to substantial discounts without affecting image quality. However, avoid gear with serious faults that impact functionality. Remember, it’s more important how the camera performs than how it looks.
Q5. What should I do if I discover issues after purchasing a used camera?
If you discover significant issues after purchasing a used camera, returning it is often the best option. Most reputable retailers offer 30-day return policies. However, make sure to read the fine print carefully and return the item in the same condition as sold, with all accessories included.