Did you know that night sky photography captures light that traveled for thousands—or even millions—of years before reaching your camera sensor?
The art of photographing stars, planets, and celestial phenomena combines technical precision with creative vision. Although many photographers find themselves frustrated by their early attempts, mastering this skill isn’t as impossible as it might seem.
Night sky photography requires specific gear, careful planning, and technical knowledge that differs significantly from daytime shooting. Indeed, understanding concepts like the exposure triangle becomes even more crucial when working in near-darkness.
From capturing the sweeping arm of the Milky Way to creating mesmerizing star trails, this comprehensive guide will walk you through everything you need to know. Furthermore, we’ll cover essential post-processing techniques that transform good night shots into breathtaking images.
Whether you’re just unpacking your first DSLR or looking to refine techniques you’ve been practicing for years, this guide contains the practical advice and technical insights to elevate your night photography to new heights. Let’s begin your journey to mastering the night sky!
Essential Gear for Night Sky Photography
Successful night sky photography begins with assembling the right tools. While expensive gear isn’t mandatory for beginners, certain essential equipment will dramatically improve your results from the first night out.
Camera with manual settings
The foundation of night sky photography is a camera that performs well in low-light conditions. Look for models with excellent high-ISO capabilities and minimal noise in dark conditions. Both DSLR and mirrorless cameras work effectively for astrophotography, primarily because they allow for interchangeable lenses and manual control of settings.
For beginners, an entry-level DSLR or mirrorless camera is cost-effective yet versatile enough to learn the fundamentals. Many photographers already own a suitable camera for daytime photography that can serve as an excellent starting point for night photography. As you progress, you might consider cameras specifically designed with low-light performance in mind, such as those with larger pixel sizes that let in more light.
Wide-angle lens with large aperture
Your lens choice often matters more than your camera body when shooting the night sky. A lens with a wide field of view is crucial not only for capturing more of the sky but also for minimizing the “trailing” effect of stars during longer exposures. Additionally, a wide aperture (denoted by a low f-number) allows your lens to gather more light in dark conditions.
Look for lenses with maximum apertures of f/2.8 or wider (f/2, f/1.8, f/1.4). These fast lenses can gather two to eight times more light than typical kit lenses, making for a tangible increase in image quality. Ultra-wide angle lenses (14-24mm on full-frame cameras) are particularly valuable for compositions including the Milky Way, especially when it’s high in the sky.
When selecting a lens, also consider optical quality. Too much coma and astigmatism distortion will give stars an irregular shape, particularly at the edges of the frame.
Tripod and remote shutter release
A tripod isn’t just recommended for night sky photography—it’s absolutely essential. Long exposures are impossible to shoot hand-held, and even the slightest camera movement can ruin your image. Choose a sturdy, stable tripod that can handle your camera and lens combination even in windy conditions.
To further eliminate vibration, use a remote shutter release or intervalometer. Pressing the shutter button directly, even with the most robust tripod, will introduce movement into your setup. An intervalometer offers additional functionality beyond a simple remote, allowing you to program delayed captures or interval shooting—perfect for star trails or time-lapse sequences.
Optional tools: headlamp, star-tracking apps
A red headlamp is invaluable when setting up equipment in the dark. Unlike white light, red light preserves your night vision adaptation, which takes 20-30 minutes to fully develop. Look for headlamps with separate buttons for red and white light to avoid accidentally ruining your night vision.
Moreover, several smartphone apps can enhance your night photography experience. Planning apps like PhotoPills help you determine exactly when and where celestial objects will appear, allowing you to compose shots in advance. Other specialized apps provide manual control of smartphone cameras, offering features like long exposure settings and interval timing for capturing star trails.
By investing in these fundamental tools, you’ll establish a solid foundation for exploring the fascinating world of night sky photography.
Mastering Camera Settings for the Night Sky
Capturing stunning night sky images relies heavily on understanding and mastering your camera’s manual settings. Once you’ve assembled your gear, knowing exactly how to configure it becomes the critical difference between disappointment and success.
Understanding the exposure triangle
The exposure triangle—the relationship between aperture, shutter speed, and ISO—becomes even more crucial in night sky photography. Each element must be carefully balanced to collect sufficient light without introducing unwanted effects.
Aperture controls how much light passes through your lens. For night photography, you’ll generally want the widest aperture available (lowest f-number) to collect maximum light. Shutter speed determines how long your sensor gathers light. Consequently, longer exposures capture more stars but risk creating star trails. ISO adjusts your camera’s sensitivity to light, with higher values brightening images at the cost of increased noise.
First, understand that night sky photography requires pushing these settings to their limits. Hence, learning to adjust them in harmony becomes essential for creating properly exposed images without excessive noise or blurry stars.
Using the 500 Rule for shutter speed
To prevent stars from appearing as trails rather than points of light, astrophotographers use the 500 Rule. This formula calculates the maximum shutter speed before stars begin to trail:
- Take the number 500
- Divide by your lens focal length (multiplied by crop factor for non-full-frame cameras)
- The result is your maximum shutter speed in seconds
For example, with a 24mm lens on a full-frame camera, your calculation would be: 500 ÷ 24 = 20.8 seconds (round down to 20 seconds). For crop-sensor cameras, multiply your focal length by the crop factor first (typically 1.5 for Nikon or 1.6 for Canon).
It’s worth noting that modern high-resolution cameras may benefit from the more conservative “300 Rule” instead, as their smaller pixels show trailing more readily.
Best ISO and aperture combinations
For night sky photography, aperture settings should typically be as wide as possible—usually f/2.8 or wider if available. Nevertheless, some ultra-fast lenses (f/1.4 or f/1.8) may perform better when stopped down slightly to reduce optical aberrations and improve edge sharpness.
ISO settings usually fall between 1600-6400 for dark skies without moonlight. Yet, there’s a careful balance to maintain—too low an ISO will require excessive brightening in post-processing, dramatically increasing noise; too high an ISO risks overexposure and diminished quality.
Ideal starting combinations for dark skies include:
- f/1.4 at ISO 1600-3200
- f/2.8 at ISO 6400
Subsequently, adjust based on your results, keeping in mind that longer exposures at lower ISO settings typically produce cleaner images than shorter exposures at higher ISO values.
White balance tips for natural colors
While shooting in RAW format allows complete white balance adjustment during editing, setting an appropriate white balance in-camera helps evaluate exposures accurately and creates consistent results for timelapses.
For most night sky photography, Kelvin values between 3400K-4400K produce the most natural-looking results. Daylight white balance (approximately 5500K) often works well as a neutral starting point. Otherwise, cooler white balance settings (3200K/Tungsten) can enhance the blue tones in the night sky while minimizing the orange cast from light pollution.
Ultimately, the ideal white balance depends on your creative vision and shooting location. In fact, specialized settings like White Fluorescent (approximately 4000K) can beautifully transform greenish airglow into pleasing turquoise hues.
Shooting Techniques for Different Night Sky Subjects
The magic of night sky photography lies in mastering specific techniques for different celestial subjects. Each celestial target requires its own approach to achieve stunning results.
Photographing the Milky Way
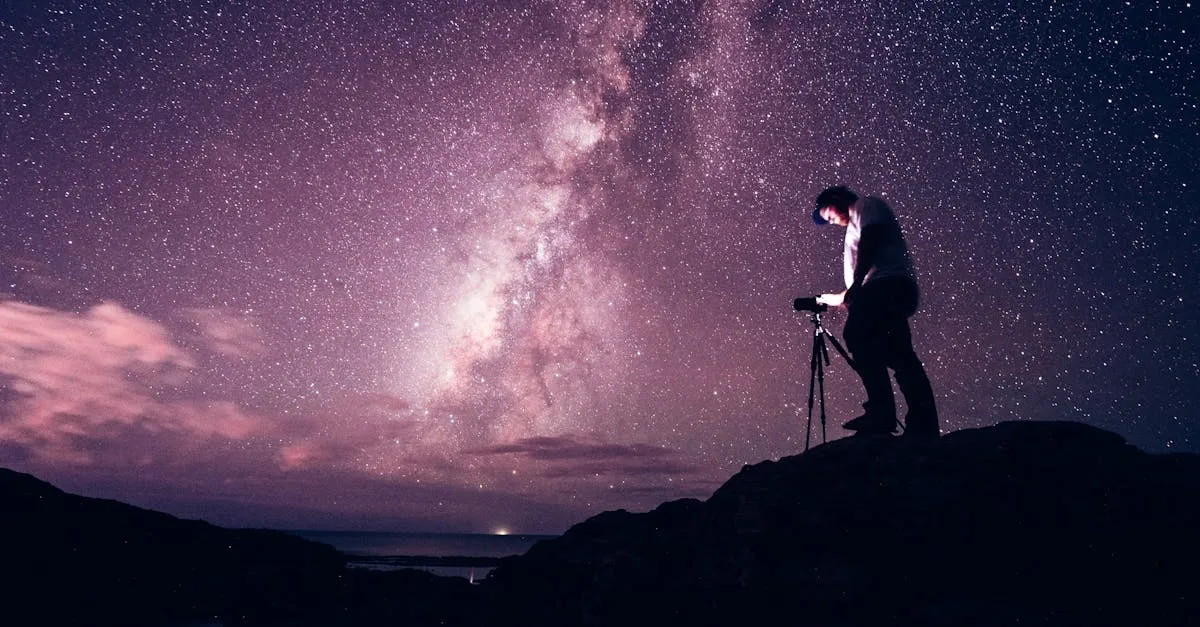
The Milky Way’s core is most visible in the northern hemisphere between April and October. For optimal results, shoot with a wide-angle lens (14-24mm) at maximum aperture (f/2.8 or lower). Set your ISO between 1600-6400 and use a 30-second exposure to capture sufficient starlight. Consider using an astronomy app like Stellarium to precisely locate the galactic core in the night sky. Remember that light pollution drastically reduces visibility, thus finding truly dark locations remains essential for dramatic Milky Way images.
Capturing the Moon with detail
Despite appearances, photographing the Moon requires a fundamentally different approach from other night subjects. Since moonlight is actually reflected sunlight, adjust your camera accordingly. Set your white balance for daylight and use a fast shutter speed with a smaller aperture—similar to daytime photography settings. According to NASA photographer Bill Ingalls, the most common mistake is photographing the Moon in isolation; therefore, incorporate landmarks or landscape elements to provide scale and context. Experiment with different lunar phases, as a partially lit Moon often reveals more surface detail through shadow than a full Moon.
Creating star trails with stacking
Star trails showcase the Earth’s rotation through beautiful arcs of starlight across the night sky. You can create these striking images through two methods: either a single long exposure (30+ minutes) or by stacking multiple shorter exposures (30 seconds to 4 minutes each). The latter approach typically produces cleaner results with brighter stars. Free software like StarStaX easily combines these images into one stunning composite. For circular star trails, point your camera toward Polaris (the North Star); alternatively, aim east or west for straight-line trails.
Including foreground elements for depth
Strong foreground elements transform basic star photos into compelling visual stories. Several techniques exist for properly exposing both sky and land. One effective approach is “blue hour blending”—taking foreground shots during twilight and then photographing the sky once darkness falls. Another option involves light painting, where you selectively illuminate landscape features with controlled lighting during exposure. For coastal or reflective scenes, shooting when humidity is low improves clarity. Moonlight can naturally illuminate landscapes while still allowing star visibility, provided the Moon is in a partial phase or positioned outside your frame.
Through careful planning and practice with these specialized techniques, your night sky photography will steadily advance from basic snapshots to captivating celestial portraits.
Editing and Post-Processing Your Star Photos
Post-processing is where the true magic of night sky photography happens, turning good shots into breathtaking celestial portraits. The right editing techniques can reveal details invisible to the naked eye and create images that truly capture the wonder of the cosmos.
Shooting in RAW for flexibility
RAW format is essentially non-negotiable for serious night sky photography. Unlike JPEG, RAW files store all the data captured by your camera’s sensor, giving you dramatically more editing flexibility. First, RAW provides a significantly higher bit depth—typically 12 or 14-bit compared to JPEG’s 8-bit—allowing for retention of billions rather than millions of possible color tones. Most importantly, RAW preserves a larger dynamic range, making it possible to recover details in both shadows and highlights that would otherwise be lost in JPEG.
Basic adjustments in Lightroom or Photoshop
Begin your editing workflow with fundamental adjustments. For underexposed night sky images, gently increase exposure without introducing excessive noise. Most astrophotographers find that boosting clarity between +50 to +76 helps define smaller stars and adds local contrast. Additionally, selectively adjust shadows (+50 to +60) to recover details in darker areas while carefully managing whites and blacks to emphasize stars against the night sky.
Noise reduction and sharpening
High ISO night photography inevitably produces noise, which requires careful treatment. Above all, strike a balance—too much noise reduction destroys fine details while too little leaves distracting artifacts. Most experts recommend keeping luminance noise reduction between 20% and 50%. After applying noise reduction, compensate for lost detail by slightly increasing the Detail and Contrast sliders. For more advanced results, consider specialized tools like NoiseXTerminator, which excels specifically at astrophotography noise reduction compared to general-purpose software.
Color grading and enhancing contrast
Proper color balance transforms ordinary night photos into extraordinary celestial scenes. A helpful technique involves temporarily increasing vibrance and saturation to +100, then adjusting white balance until colors look balanced before resetting these values. Many night sky images benefit from color temperatures around 3900K. Afterward, use the Color Grading panel in Lightroom or selective color adjustments in Photoshop to enhance the natural colors of the Milky Way while avoiding an artificial appearance.
Remember that post-processing is as much art as science—experiment with different approaches until you develop a workflow that produces results matching your creative vision.
Advanced Tips to Take Your Skills Further
Once you’ve mastered the fundamentals, elevate your night sky photography with these advanced techniques that push your images into professional territory.
Using apps like PhotoPills for planning
Planning is fundamental to capturing exceptional night sky images. PhotoPills has become an indispensable tool that helps visualize exactly where the Milky Way will appear on any given night. Initially, use its Augmented Reality feature to overlay celestial bodies directly on your smartphone screen, allowing precise composition planning even months in advance. Furthermore, the app indicates galactic center visibility times, helping you determine the optimal shooting date and location.
Blending exposures for dynamic range
Night scenes often exceed your camera’s dynamic range. To overcome this limitation, shoot one exposure for the brighter sky and a second for the darker foreground. Afterward, combine them in Photoshop using layer masks – brushing off the top layer along the bottom half to reveal the lighter foreground beneath. This technique creates balanced images impossible to achieve in a single exposure.
Experimenting with panoramas and stacking
For breathtaking wide-field views, try multi-tier panoramas where each row overlaps the previous by approximately 50%. Meanwhile, stacking multiple exposures of the same scene dramatically reduces noise while preserving detail. Specialized software like Sequator (free for PC) or Starry Landscape Stacker (for Mac) aligns stars between frames, creating cleaner final images.
Tracking planets and meteor showers
For meteor showers, locate the radiant point—where meteors appear to originate—to optimize your composition. Simultaneously, understanding that meteors can appear anywhere necessitates using the widest possible lens to capture maximum sky coverage.
Conclusion
Night sky photography represents a perfect blend of technical precision and artistic vision. Throughout this guide, we’ve explored everything from essential equipment selection to advanced post-processing techniques. Your journey begins with the right gear – a capable camera, fast wide-angle lens, and sturdy tripod form the foundation of stellar night images.
Understanding the exposure triangle becomes particularly crucial when shooting in near darkness. The 500 Rule helps prevent star trailing, while proper ISO and aperture combinations capture clean, detailed night skies. Different celestial subjects demand unique approaches, whether you’re photographing the sweeping arc of the Milky Way, capturing lunar details, or creating mesmerizing star trails.
Post-processing transforms good captures into extraordinary images. RAW format provides the flexibility needed to reveal hidden details, while careful noise reduction and color grading bring out the true beauty of the night sky. Advanced photographers can take their work further through exposure blending, panoramas, and careful planning with specialized apps.
Remember that each successful night sky image represents a learning opportunity. Failed attempts teach valuable lessons about equipment limitations and optimal settings. Practice remains your greatest ally as you refine your technique and develop your unique style.
The night sky offers endless photographic possibilities for those willing to venture out after dark. Armed with the knowledge from this guide and a spirit of experimentation, you now possess everything needed to create breathtaking celestial images. The stars await – grab your camera, find a dark sky, and start capturing the magnificent universe above!